Reproducible, Painless Developer Environments
Onboarding to an engineering team can be difficult. Even with good onboarding documentation and helpful colleagues, it can be challenging to get up to speed with a new problem domain and new tooling at the same time. Unfortunately, onboarding isn’t a one-time cost paid to get new hires up to speed; you can change teams, change roles, change projects, or even just revisit an old project and need to get reacquainted with processes and tooling.
At CMT, we’ve improved the onboarding process using Nix to get developers set up quickly and reliably.
Nix
Nix is a package manager, meaning you can use it to install (and build) software; it competes with tools like apt, yum, or Homebrew, and offers many advantages. In particular, Nix is
Declarative. Rather than explaining what steps you want taken to set up an environment, you simply describe the environment you want and Nix creates it.
Reproducible. Given the same declarative description of an environment, Nix will produce the same result, byte-for-byte. (No more “it works on my machine” style problems!)
Example: setting up a Python environment
Let’s try to make a basic Python environment for exploratory data analysis. First, we’ll do this in Docker, since containers are one way to share a development environment; second, we’ll do it in Nix.
First, we make a simple Dockerfile installing Python 3.12, some common analysis libraries, and Jupyter.

We can add a docker-compose.yml file to make it easy to bring up and down our container:
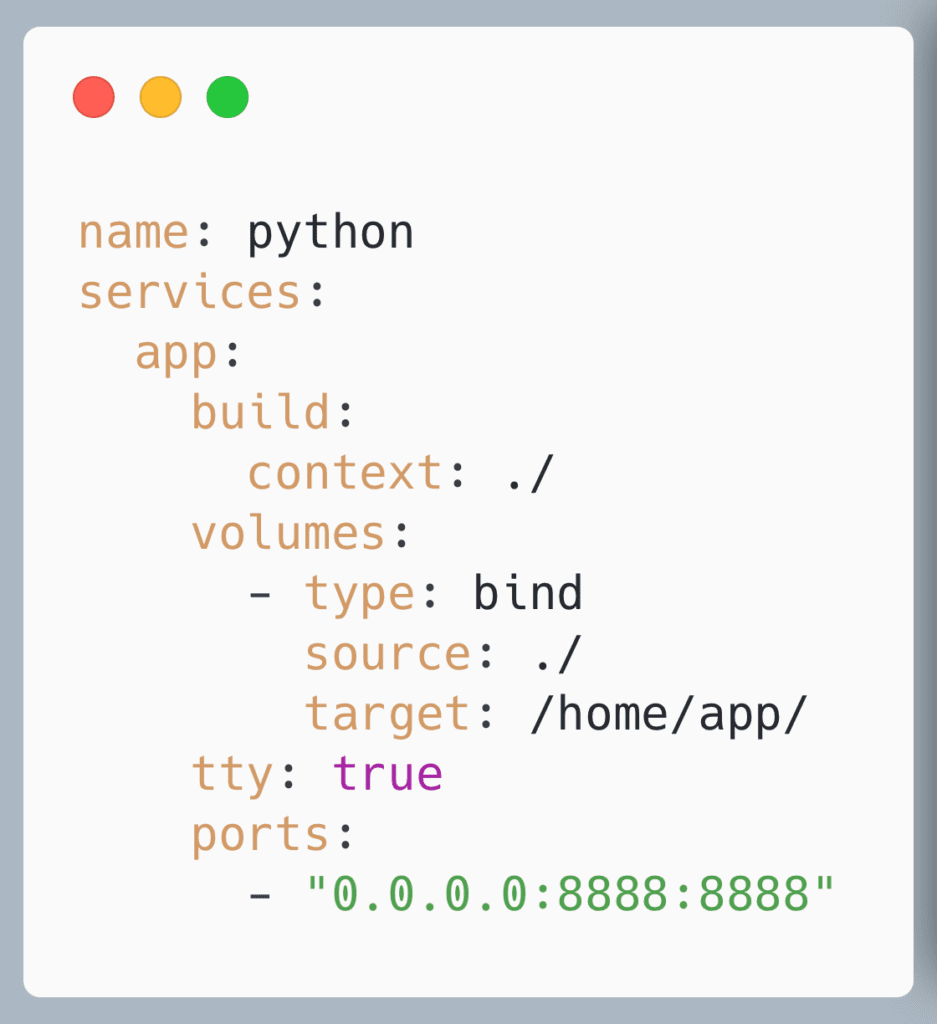
and now we can run docker compose up and point our browser at localhost:8888 to access the analysis environment.
This works nicely, but there are some shortcomings:
- The versions of libraries we installed are not fixed. If you rebuild the container, you could get different package versions
- Building the container relies on remote state we don’t control. For example, we rely on
apt updateto find packages for us; at some point, what we find could change, or not be found at all - Adding more dependencies requires rebuilding the container
Let’s try this with Nix instead.
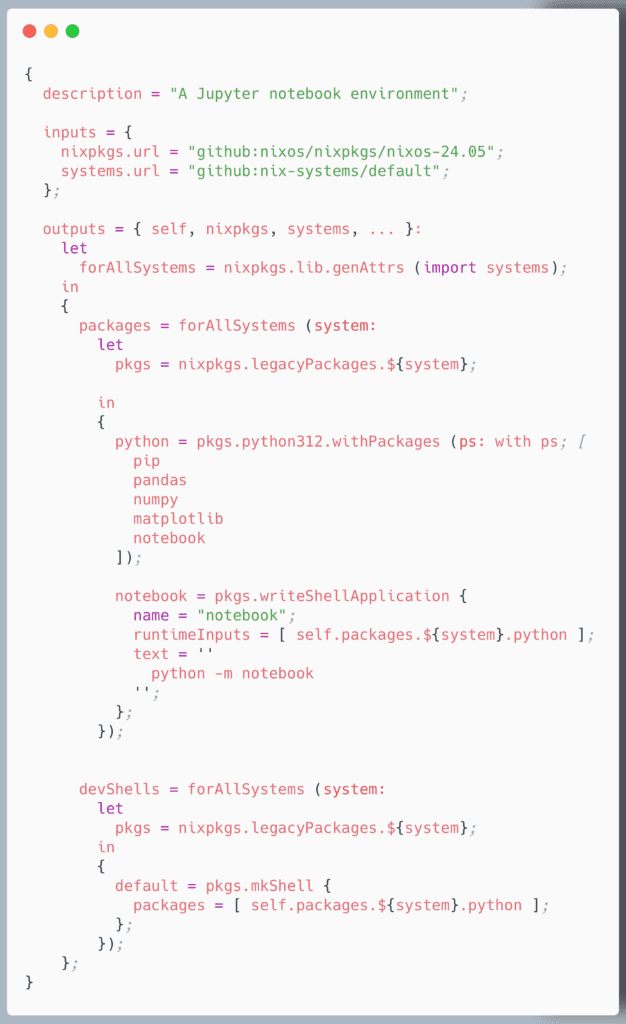
This is a “flake,” which is just a way of organizing Nix code; broadly, flakes map inputs (Nix code in other flakes) to outputs (the programs we want to run). Here, our inputs are
With this, we can run
nixpkgs, a (large) collection of software that’s been adapted to build under Nixsystems, a (tiny) flake defining strings likeaarch64-darwin, so we don’t need to remember how to spell them.
Our outputs are
python, a Python environment withpandas,numpy,matplotlib, andnotebookinstallednotebook, a command that will launch a Jupyter notebook server- A shell environment that makes available to us all our dependencies.
With this, we can run
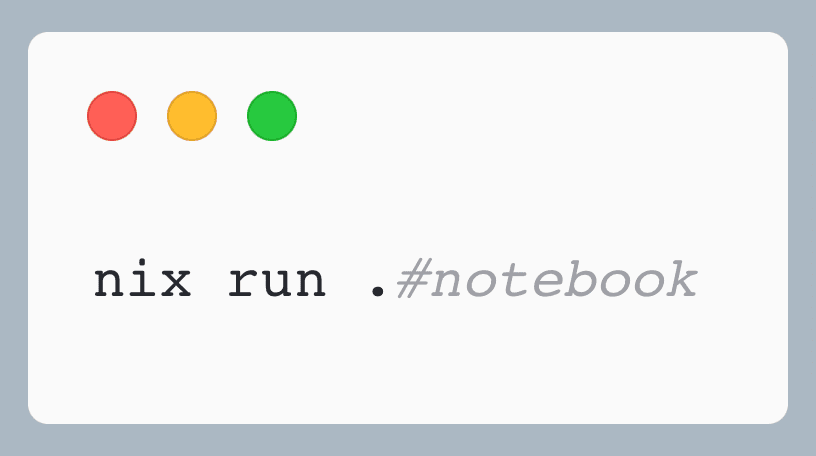
to launch our notebook server. Since we’re not running in a container, our browser automatically launches with the notebook URL loaded, including the token we had to copy and paste with the Docker workflow.
We can also run
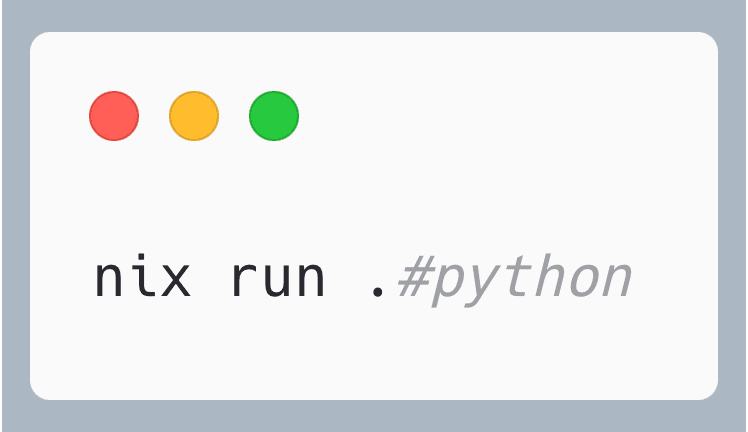
to enter a python REPL with our dependencies available.However, the best feature is nix develop, which puts us in a shell where python resolves to Python with our packages; this allows us to use our ordinary command-line workflow with our Python analysis environment. If you use direnv, you can run echo use flake > .envrc to automatically load this environment when you enter the directory. For example,
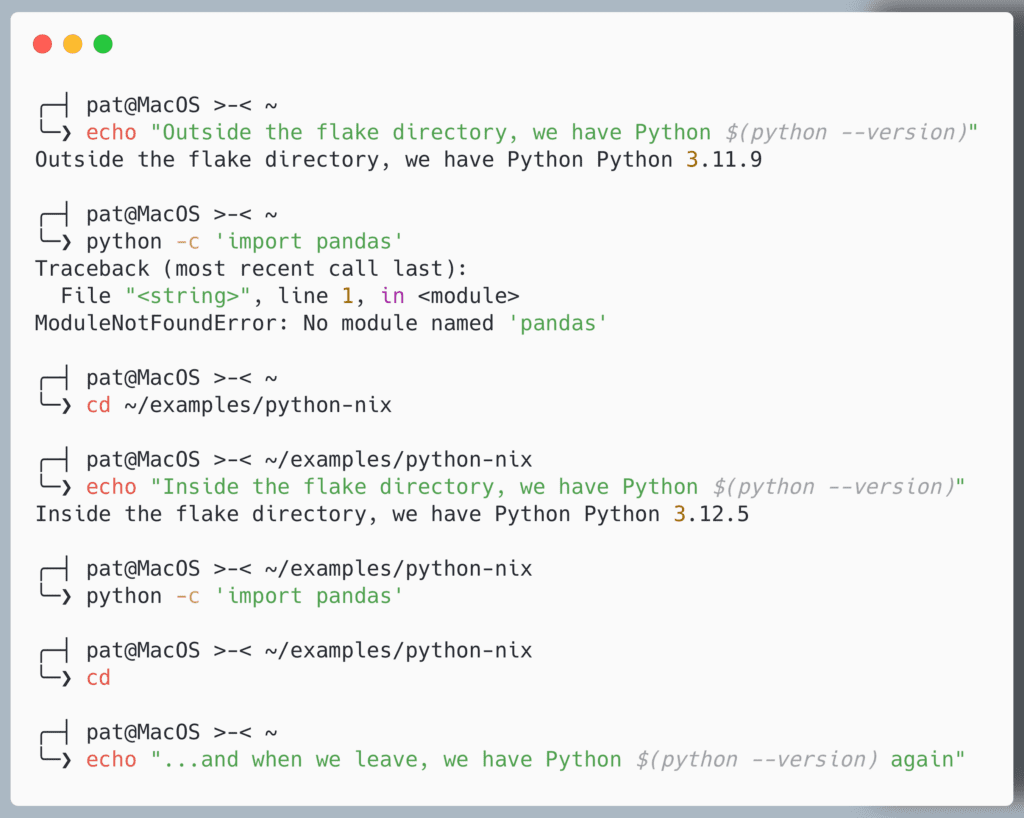
So when we enter our directory with our flake, we automatically have PATH modified so that python resolves to our Python with analysis libraries, and this doesn’t affect our global installation at all.
Let’s compare this approach to the containerized approach. First, with Nix our code runs directly on our machine; this means that there’s no indirection to a container, no need to mount filesystems, and all your existing tools works seamlessly in the new environment. Second, this environment is completely reproducible: the flake.lock contains
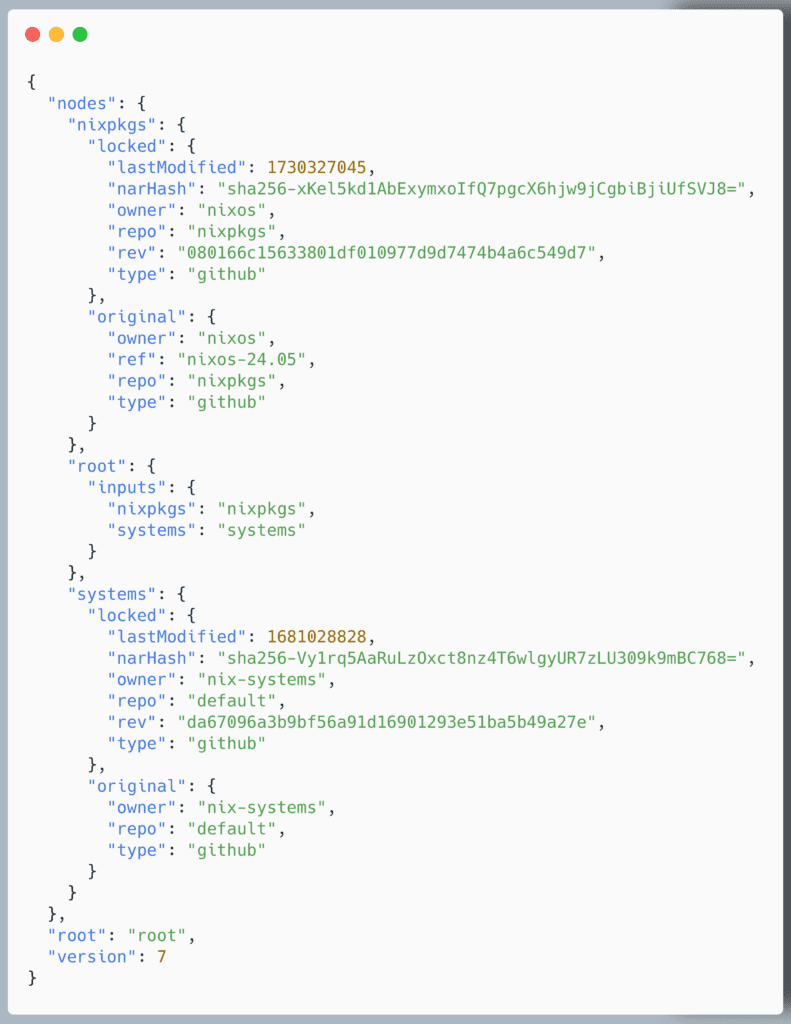
which specifies Git revisions for each input we use. Nix uses these to transitively find the exact source code used to build our programs, ensuring that we get the same software each time we build.
Example: configuring your entire computer
Using Nix to manage a project ensures that anyone working on that project can quickly get up to speed. But what about your laptop? There is a project called Home Manager that lets you use Nix to configure your computer, and this even works on MacOS. A Home Manager configuration is a flake like we saw above, but with a particular structure describing your computer.
A basic configuration might look like
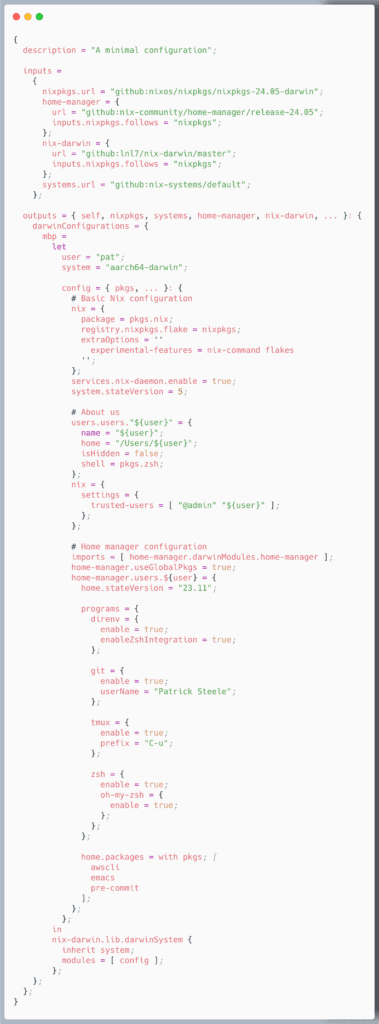
(In real use, you could organize the configuration into smaller files and link them together, which can make the result much more readable.)
If we were to run darwin-rebuild switch --flake .#mbp in the directory containing that file, we’d swap our machine’s configuration out for the one it declares. If we did that, we’d get
- A default
zshshell, with oh-my-zsh enabled - Git installed and configured with our username
tmuxinstalled, with our chosen bind key ofC-u- some common programs, like
aws,emacs, andpre-commitinstalled
We can track this configuration in Git, evolve it over time, and roll back to previous versions. (For example, I actually swapped my configuration for this one to make sure it worked, and then swapped back! Try doing that without Nix.)
Putting it all together: sharing tools
So far we’ve show how to
- to make a development environment for a project (our Jupyter notebook with some pre-installed Python libraries)
- configure our personal computer
Let’s put these together, and show to share programs with our colleagues. Let’s suppose our colleague made the Jupyter environment, and published on Github at github.com/OurCo/notebook. While we could git clone that project to run it locally, we’ve found it to be so useful that we want the command notebook to always be able to pull up a local Jupyter notebook. Let’s add it to our Home Manager configuration!
First, we add an input to our flake:

Next, we add the notebook output from the flake into our list of packages:
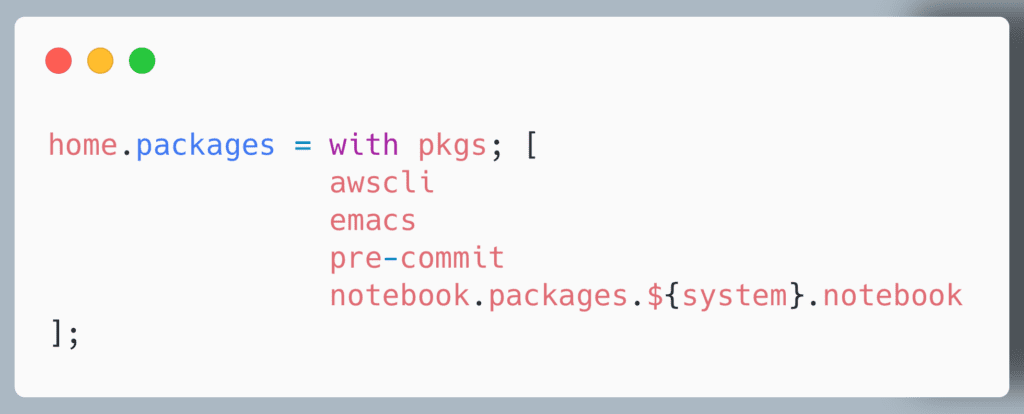
Now after we run darwin-rebuild switch --flake .#mbp, the program notebook is available, and launches a Jupyter server for us.
If our colleague updates the tool, we can remain on the existing version (our flake.nix has the Git hash we built against) or we can update to the latest version. If we do update, later on we can easily downgrade again — if our configuration builds once, it will build again in the future!
Summary
Using Nix allows us to
- manage our computers
- manage projects
- share programs and configuration between computers and projects
while at the same time ensuring that no project interferes with another project. It’s perfectly fine to work on a project that uses Python 3.12 and then switch to a project using Python 3.11 (or even to a project using a different tool chain entirely!) It also doesn’t matter how we choose to configure our machine in general: you can use whatever programs you want by default, and when you enter a project you can run nix develop to get exactly the same tools as other developers.